If you're an avid PC gamer, then you're probably well familiar with the term overclocking, which is basically just tweaking your computer hardware to run faster than it was originally intended.
Why would you want to do that?
Let's say the processor in your PC is listed as 2.2 GHz. You could tweak the settings in the BIOS and bam—you're PC now runs at 2.9 GHz, faster with even better performance. For a gamer, speed and performance are must-haves to winning.
And you know what? Overclocking isn't just for computers.
A few curious Androiders over in our Nexus 7 SoftModder forum have been discussing the possibilities of overclocking their tablets. So, in this article, I'll show you how to overclock your Nexus 7 (running Jelly Bean 4.2.2) from 1 GHz to 1.6 GHz and reap the benefits of blazing fast speed and performance!

Games will feel smoother, apps will launch faster, and that Android lag will disappear!
- Speed Note: Not all Nexus 7s are made the same. Some can be easily overclocked to 1.6 GHz and maybe even a bit more, while some only slightly. Your mileage may vary.
- Battery Note: You'll be pushing your Nexus 7 to run faster than it was intended, so your battery life will be lower.
- Heat Note: Faster speed means a hotter running Nexus 7; this is to be expected.
So, if all of the above is okay with you, let's get started!
Before You Start Overclocking
You'll need to be rooted with a custom recovery installed. If you're not there yet, make sure to head on over to my definitive guide to softmodding your Nexus 7 tablet to root and install a custom recovery tool, then proceed below.
Step 1: Download the Motley Kernel
On your Nexus 7 tablet, download the Motley kernel using this link(UPDATED LINK!).
What is a kernel? It controls the operations between your tablet and the OS.
Step 2: Install the Motley Kernel
Boot into your custom recovery of choice (in my case, TWRP) by powering by off your Nexus 7 and then pressing both the volume down and power button at the same time. Then simply...
- Tap Install.
- Browse for the .zip file you just downloaded.
- Tap on it and Swipe to Confirm Flash.
- Reboot.
Step 3: Install BusyBox and TricksterMOD
The kernel should be installed now, but you'll still be running at stock speed. In order to unleash the full power of your Nexus 7, you'll have to download a couple apps from the Google Play.
On your Nexus 7, download both BusyBox and Trickster MOD. They're both free, so don't worry.

- BusyBox is a very complicated app, but to simplify it for you, it allows your tablet to do more complex kernel functions running in the background.
- Trickster MOD allows you to tweak your CPU and GPU (graphics) speed. This will allow you to overclock your Nexus 7!
Step 4: Set Up BusyBox
Launch BusyBox and tap Install at the bottom.
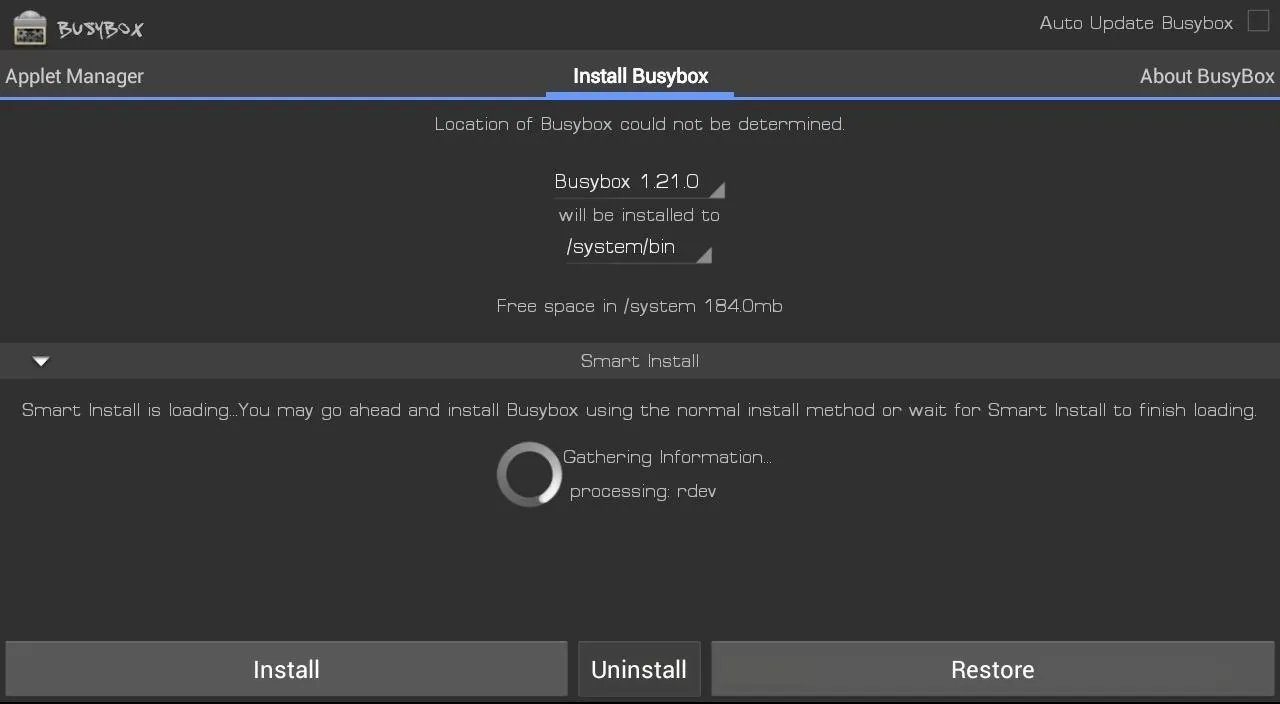
That's it for BusyBox. Now, let's start overclocking!
Step 5: Overclock with Trickster MOD
Launch the Trickster MOD app and tap the Specific tab and change the GPU Max Frequency from 446 to 520. Tap the check icon in the top right to save these settings.
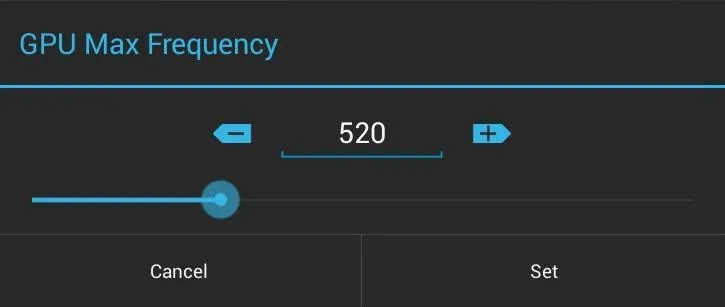
We just overclocked the GPU! Now we'll overclock the CPU.
Go to the General tab and find CPU Frequency Control and change the default settings to Min: 1000000 and Max: 1600000. Tap the check at the top right to save these settings.
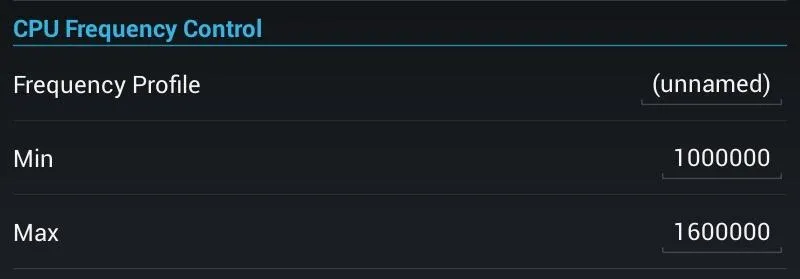
We'll want these settings to be automatically applied every time you boot up your Nexus 7, so head over to the top right again and choose Set On Boot and check Enable.
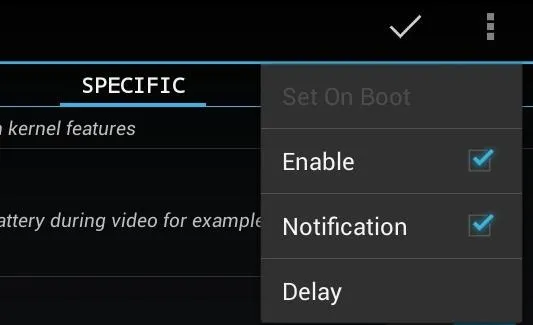
Now just reboot your Nexus 7 and enjoy blazing fast speeds!
The Difference It Makes
Here's a few benchmarks showing the speed increase in the Nexus 7.
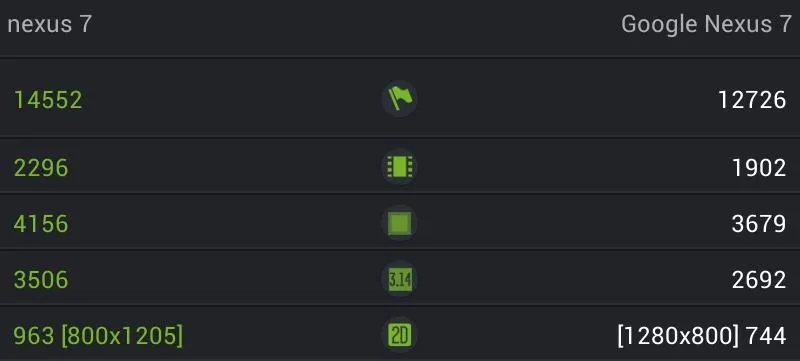
Here, the overclocked Nexus 7 is to the left and the stock speeds on a unmodded Nexus 7 are to the right. The stock one got creamed!
That's it! Give this a try and tell us how fast your Nexus 7 has gotten by overclocking it. If you have any questions, feel free to ask below.
Photo by Stephane <3


Comments
No Comments Exist
Be the first, drop a comment!