The Nexus 7 is a huge jump in screen size when coming from a phone, but obviously this tablet is still smaller than some of the major players such as the Nexus 10, Galaxy Tab, etc. One way to squeeze out a little more space is to eliminate the navigation and status bars.
Nelson wrote about the Paranoid Android team's amazing PIE Controls, which eliminates the two bars while allowing all of the same functionality. But as great as PIE Controls are, it's a somewhat drastic change in the way we control our devices.
Now, we have another option to clear up our home screens.
Android developer tsorn created full!screen, a dead simple replacement for your navigation and status bars. Super easy to use, this app allows you to keep the familiar "Home" and "Back" buttons, while also utilizing long presses and swipes for other actions. Let's jump right in!
Before You Begin, You Must Be Rooted
First off, this app does require that you are rooted, so make sure to check out our softModder guides for rooting the Nexus 7 (for Windows and Mac). It's incredibly simple and won't take more than 10 minutes of your time.
Step 1: Download Full!Screen
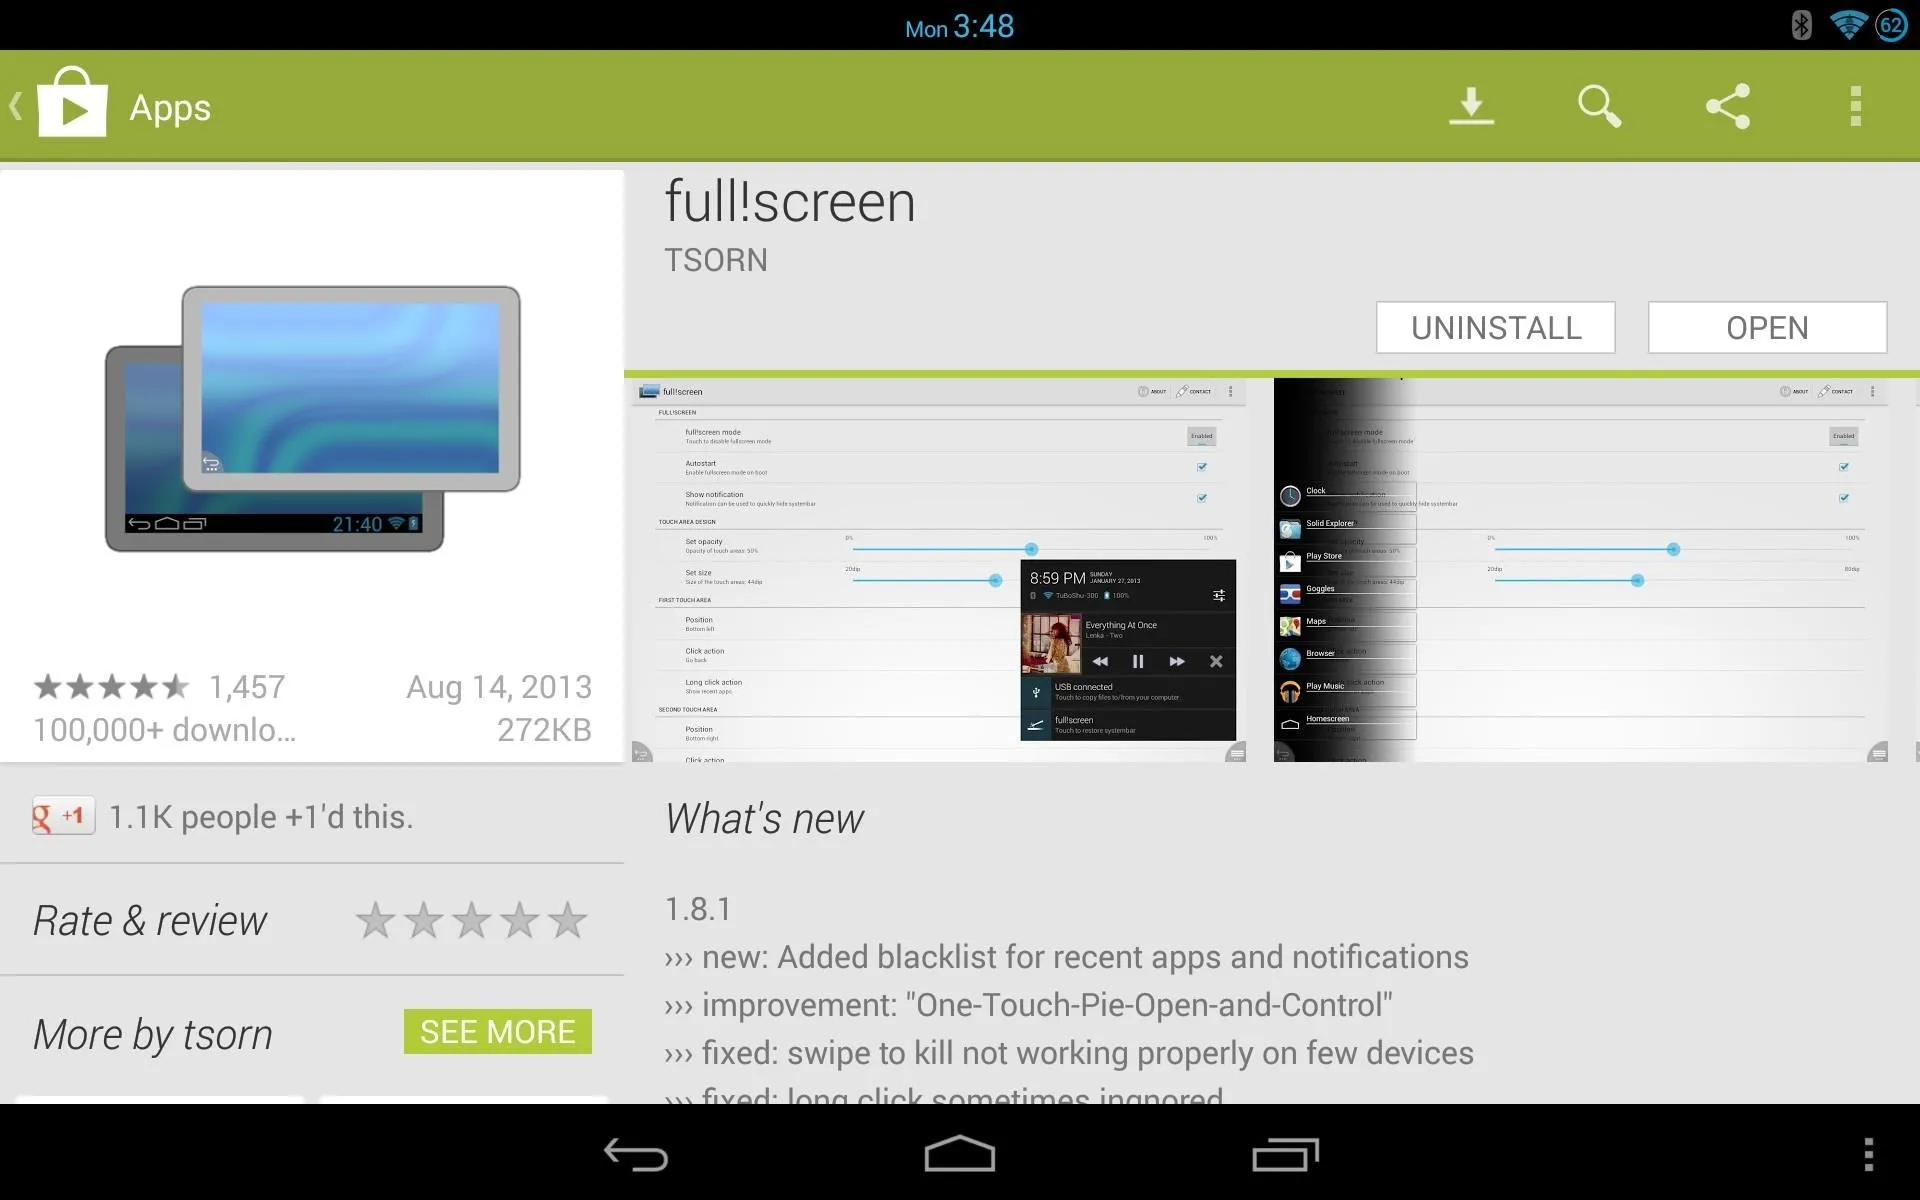
Head on over to the Google Play Store and grab the full!screen app. It'll install like any other app.
Step 2: Allow Root Access
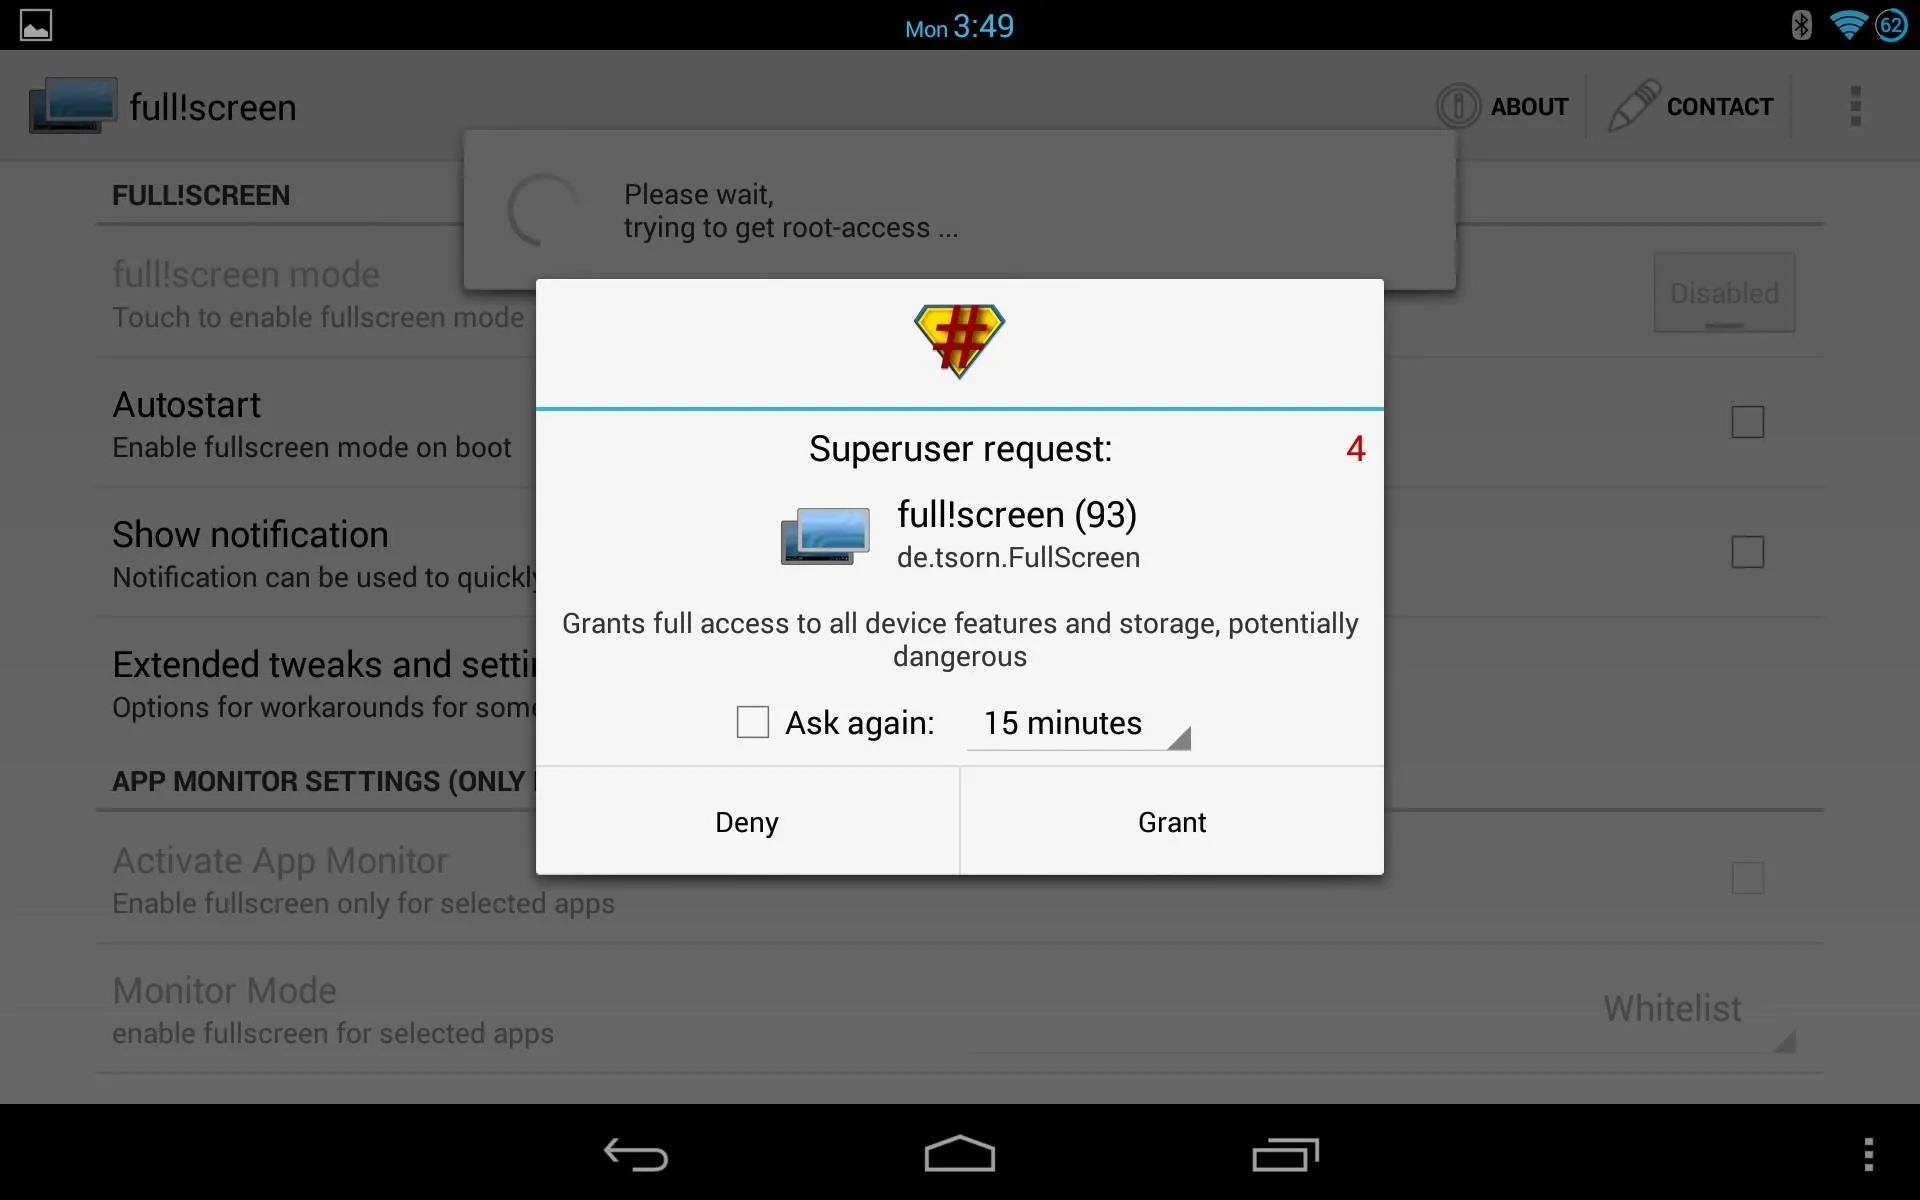
Go ahead and fire the app up. When you run it for the first time, it's going to prompt you for root access. Grant it.
Step 3: Enable Full!Screen
Now, start by tapping the first option within the app to enable it. Once you've done that, you'll see your status bar is gone, and your navigation bar has been replaced the two buttons on either side along the bottom of your screen.
Step 4: Full Screen Options
Let's take a look through the various options within the app.
Button Sizes & Colors
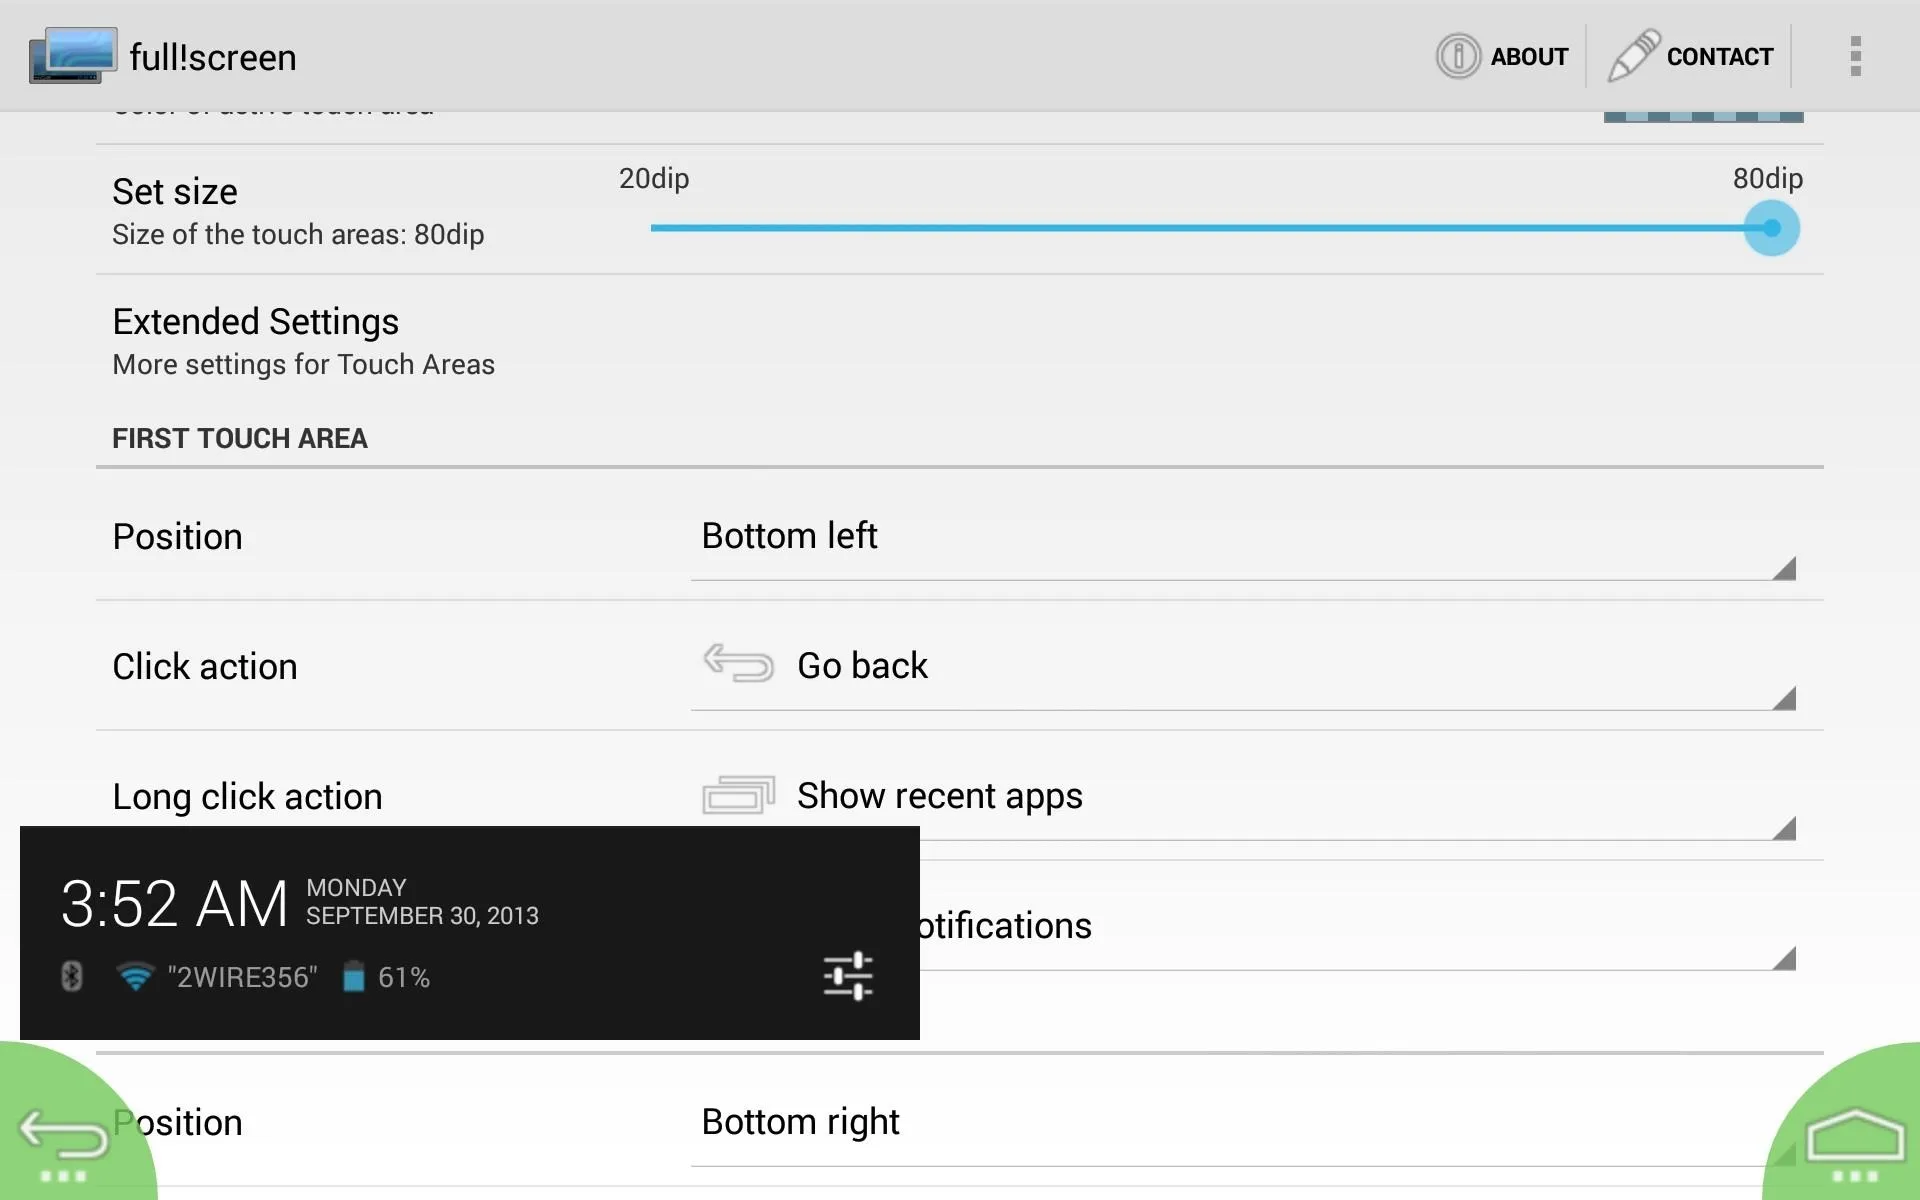
Scroll down a bit and you'll see Touch Area Configuration. Here, you can change the button colors and size. In the picture below, the "normal" button is green, and it will change to blue when pressed.
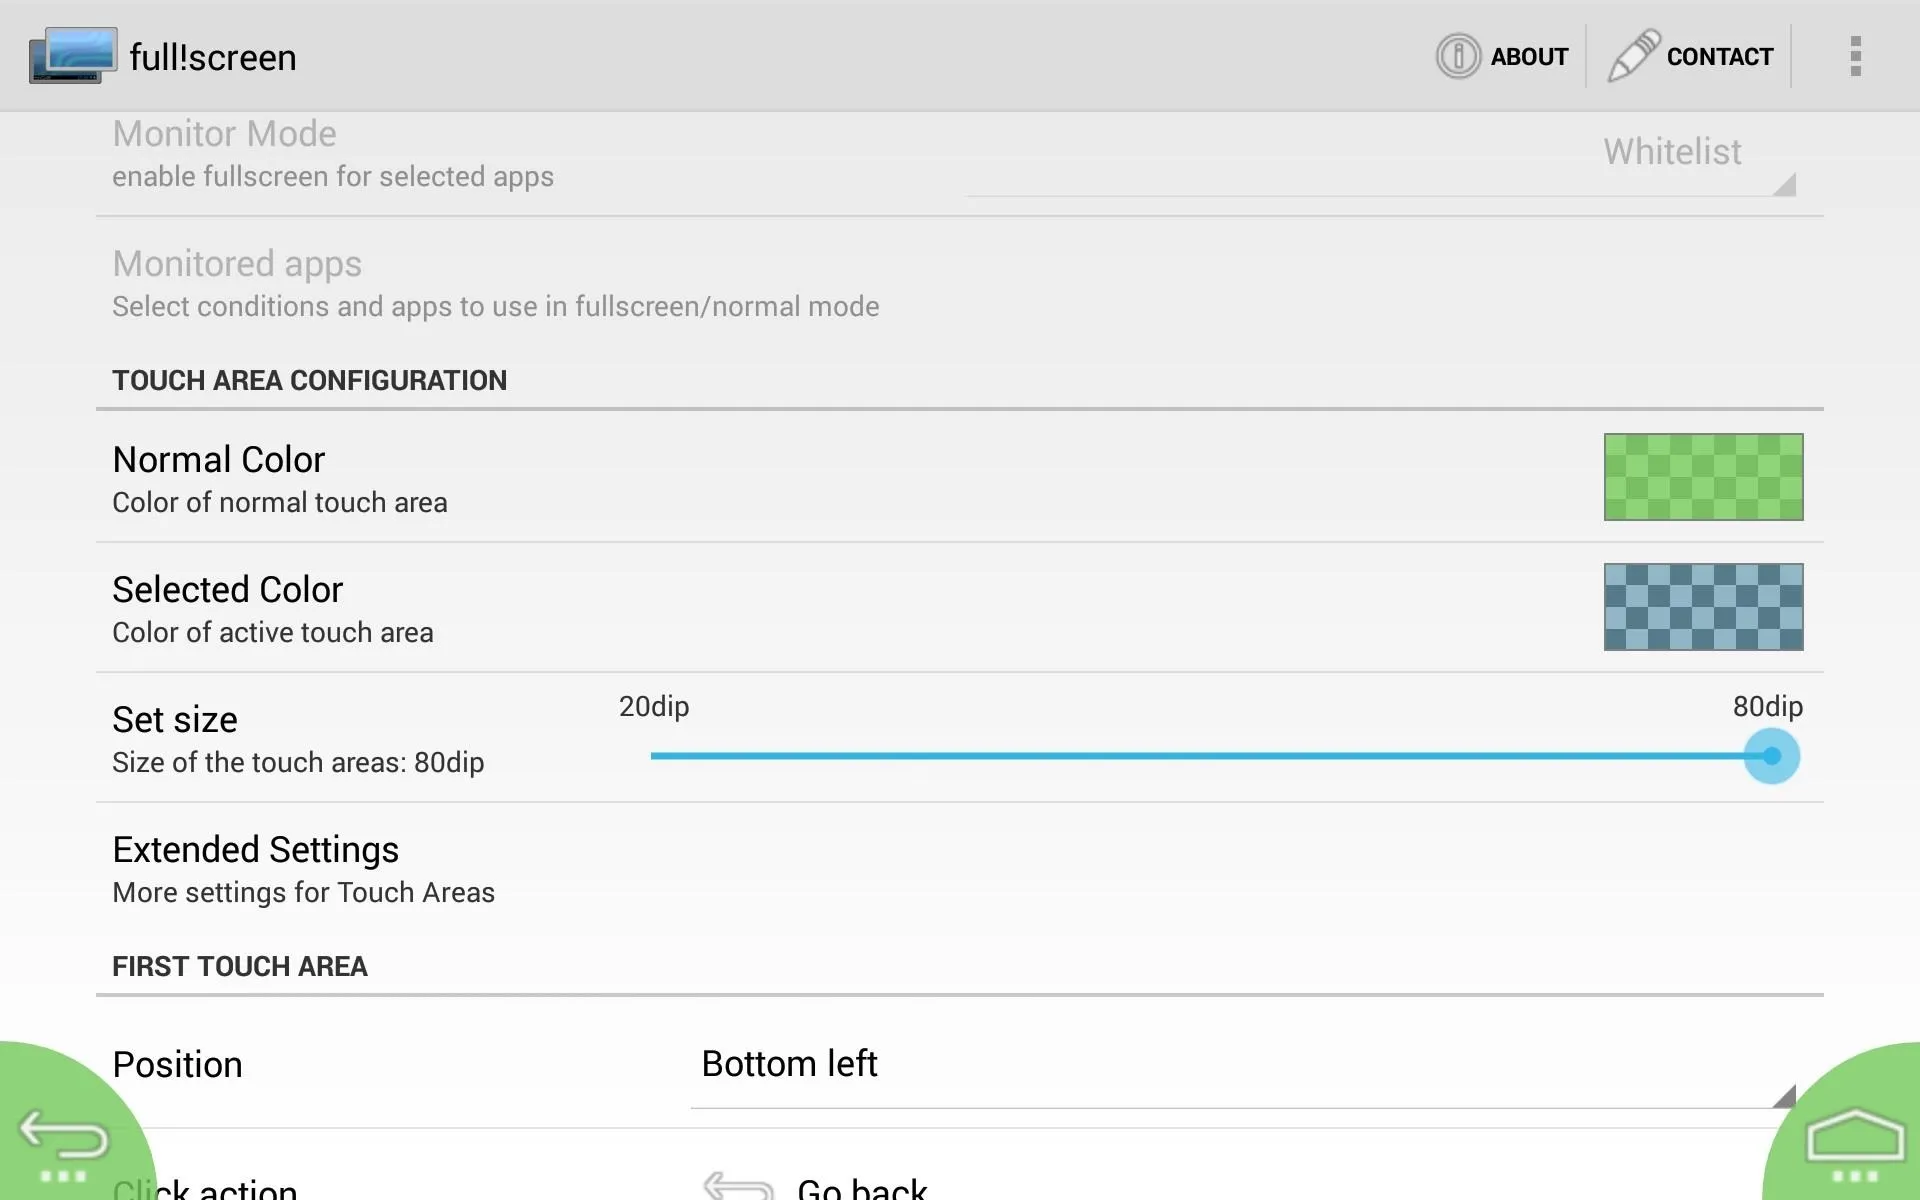
Also, the size in this example is set to the highest setting...play around and adjust until you find a size you're comfortable with.
Button Locations & Targets
You can pick and choose where you want your buttons, and what you want them to do. Simply select the positions, then select a Click action (one press), Long click action (press and hold), and Swipe Action (upward swipe on the button).
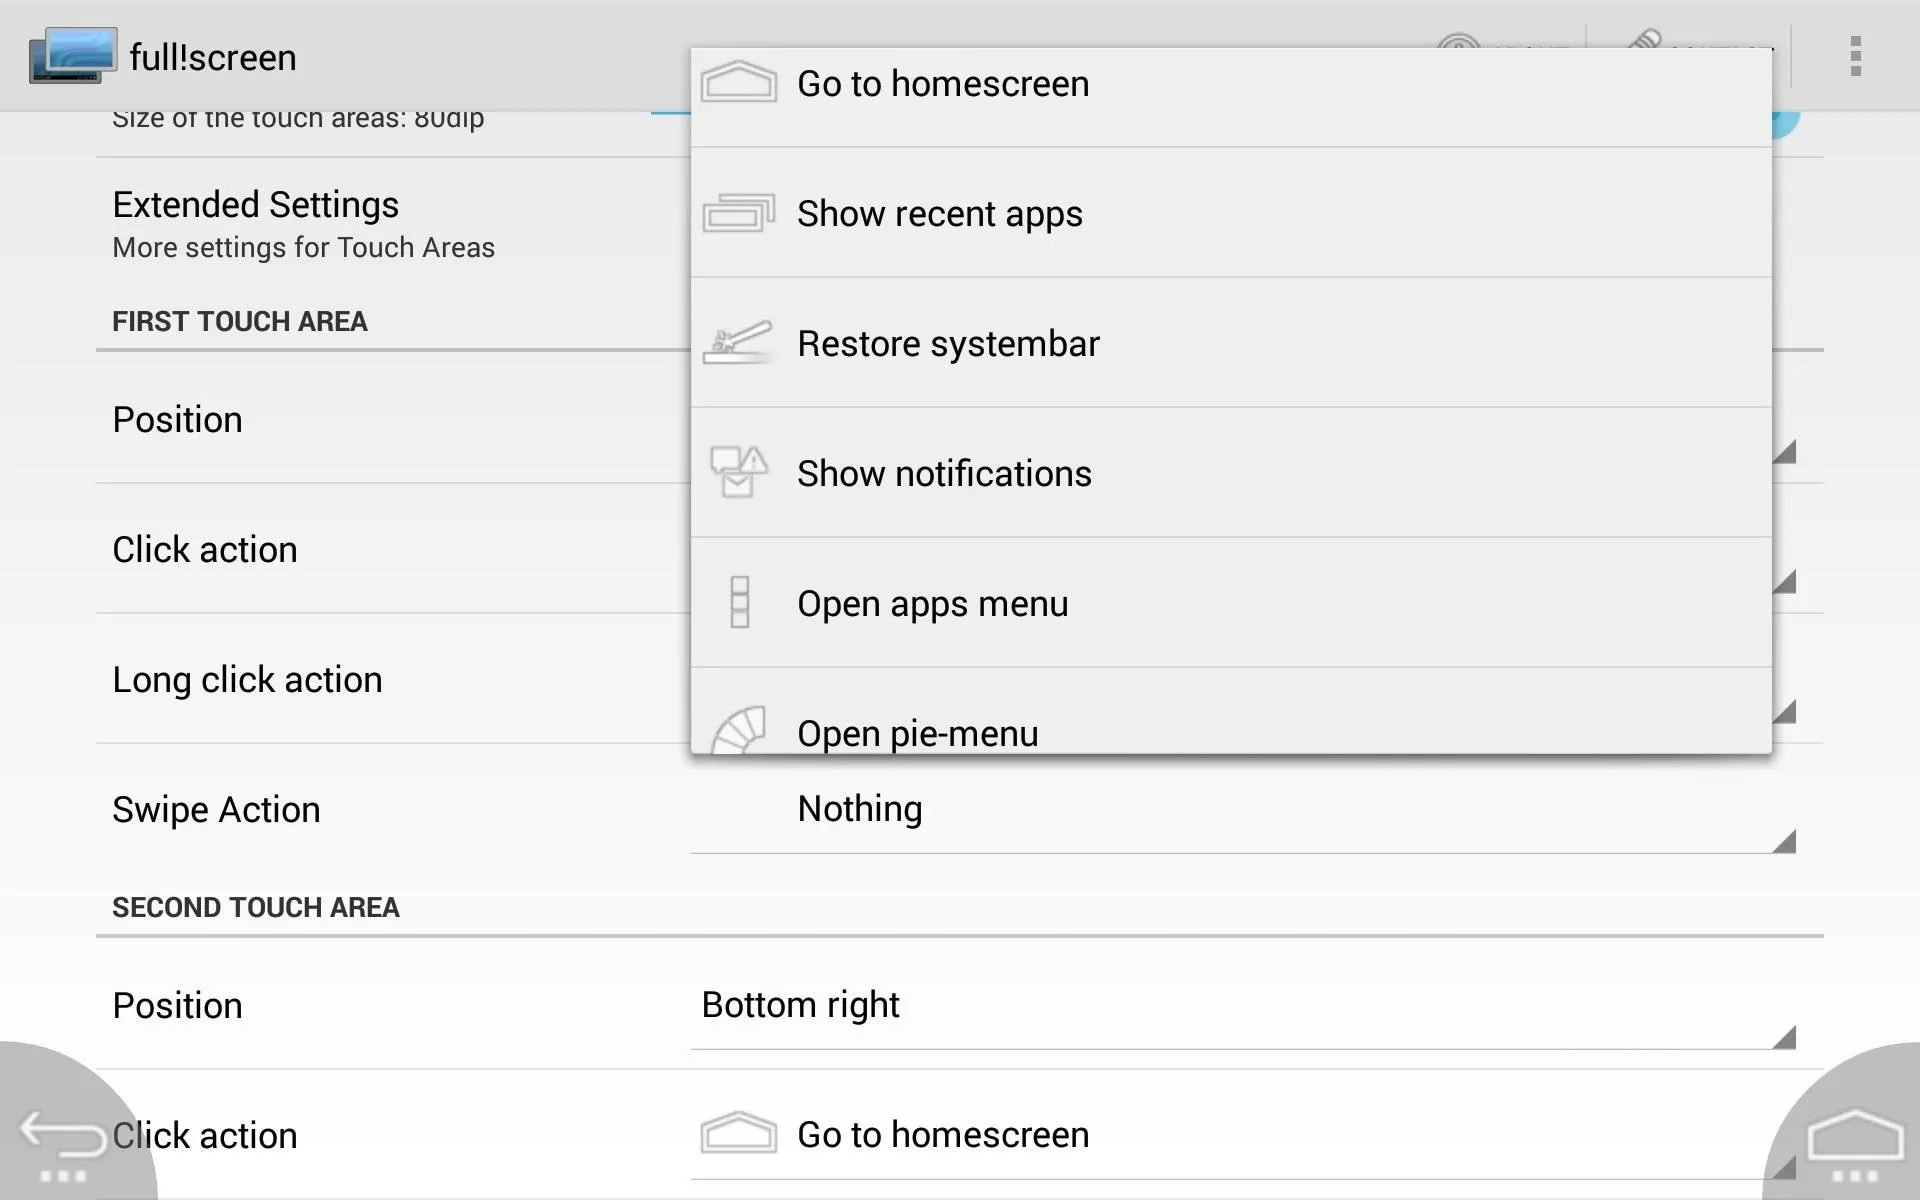
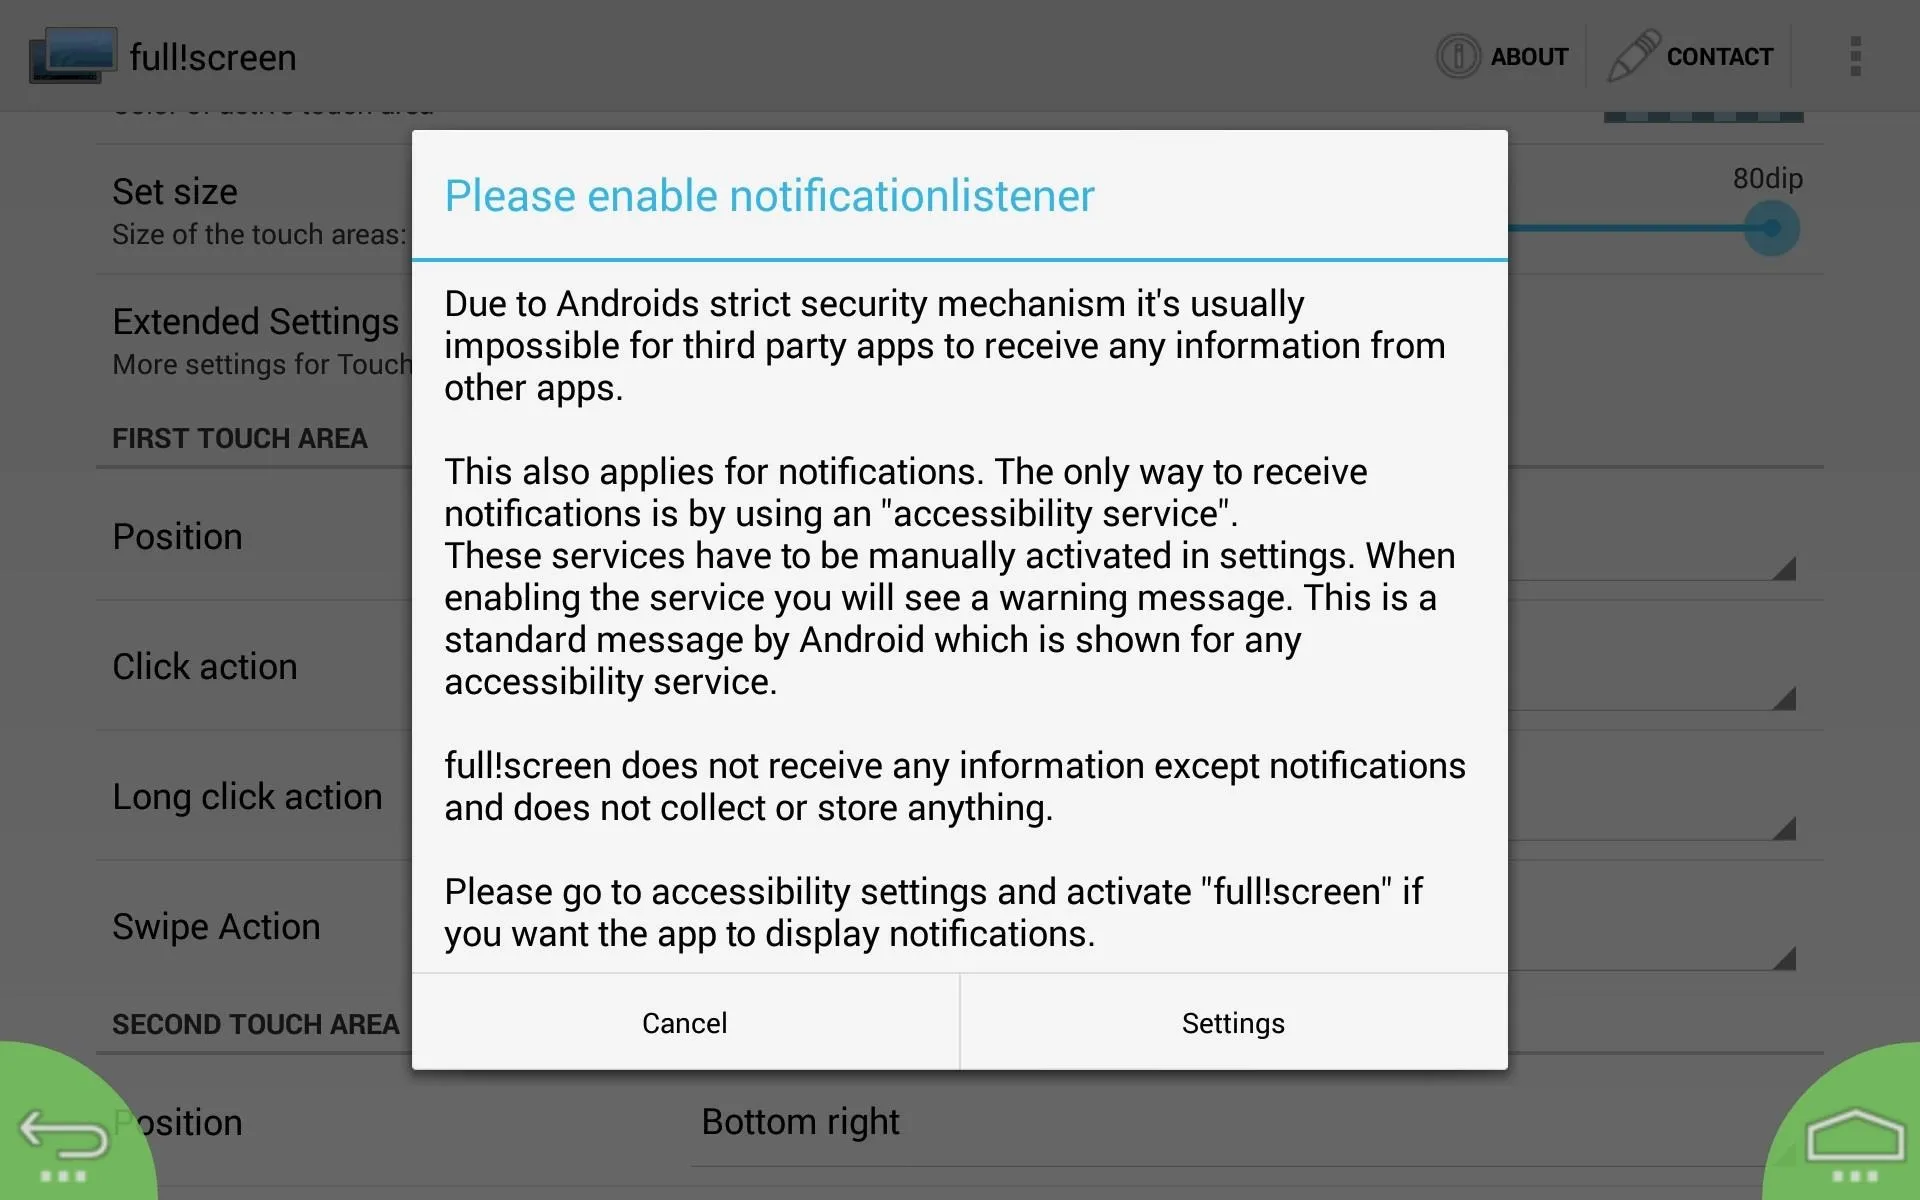
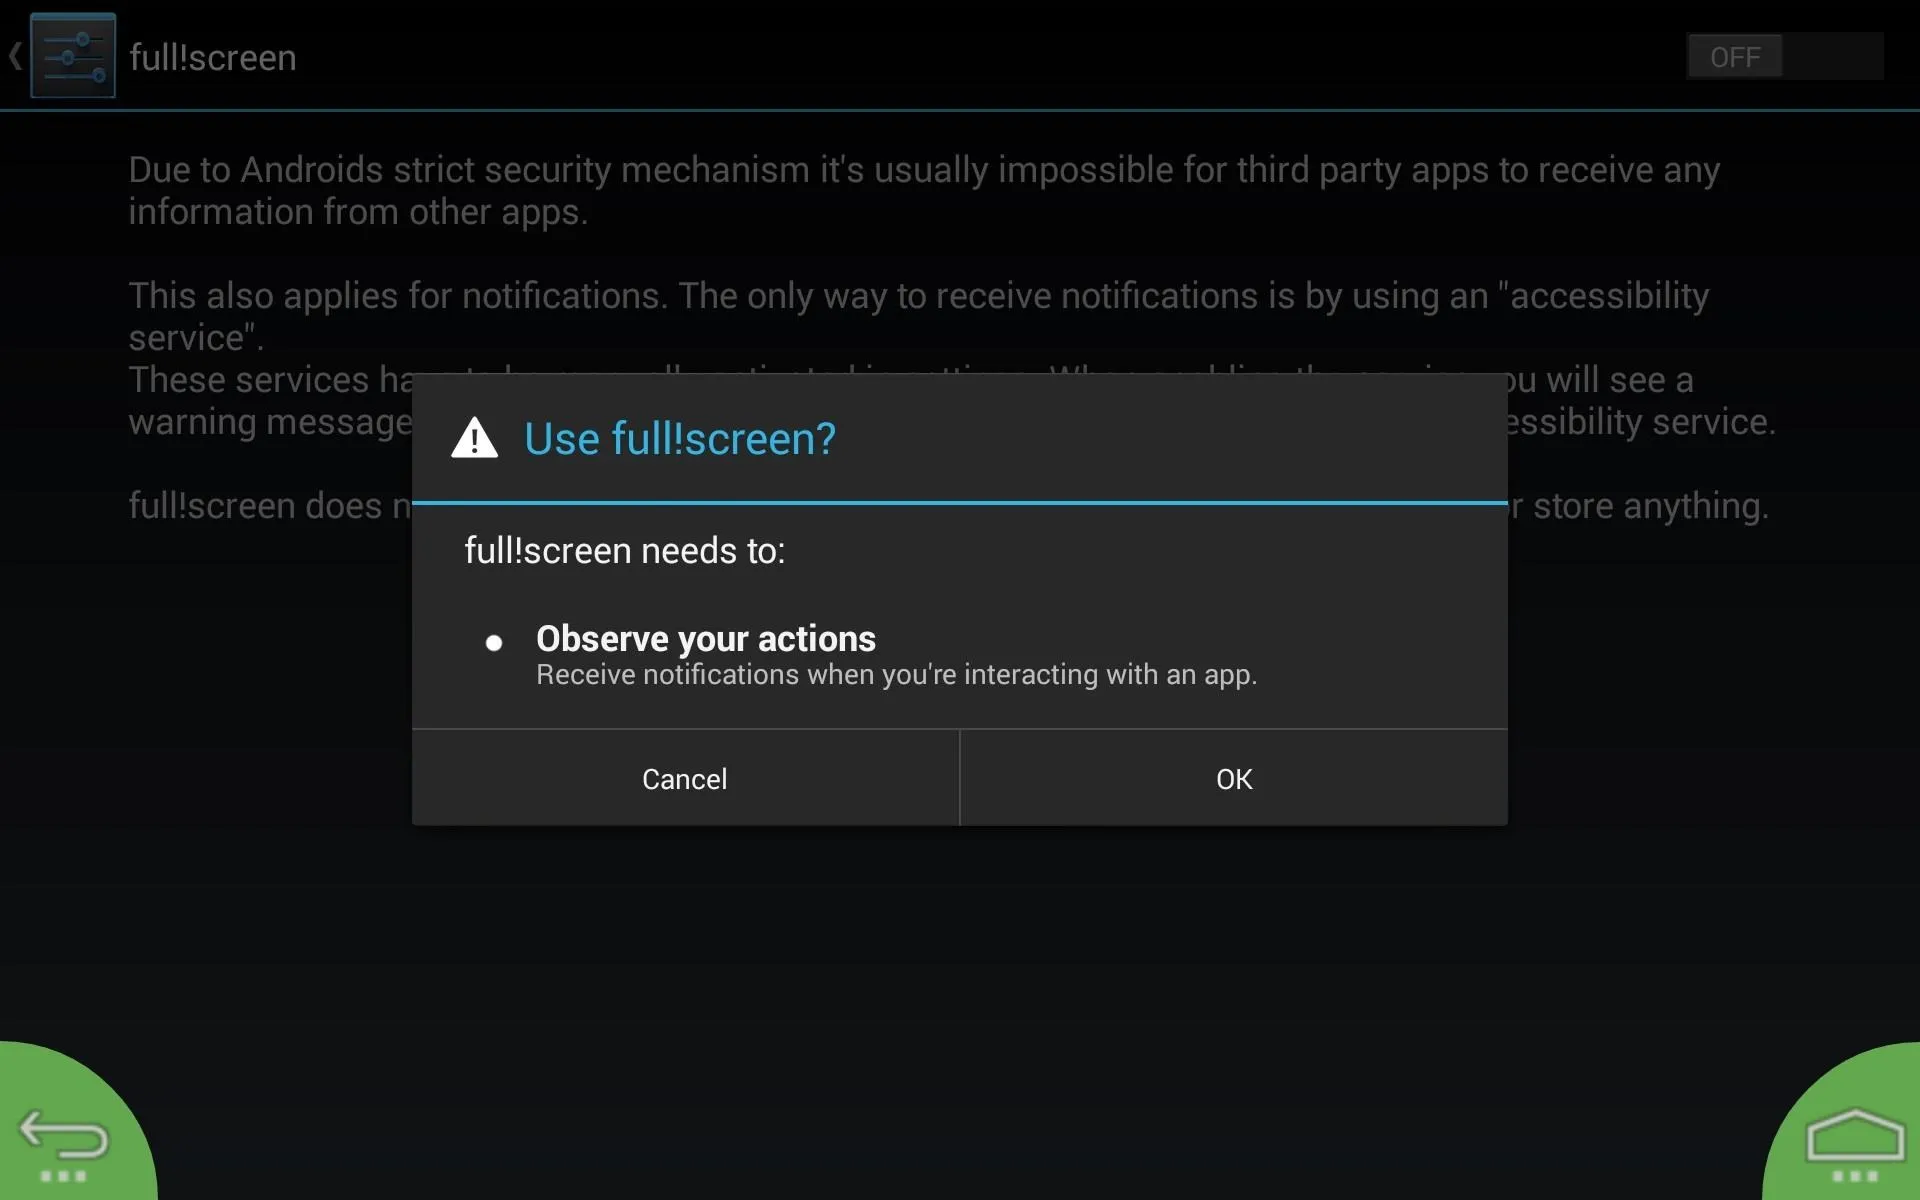
If you choose to have one of the actions set to Show notifications, a few extra steps will be involved.
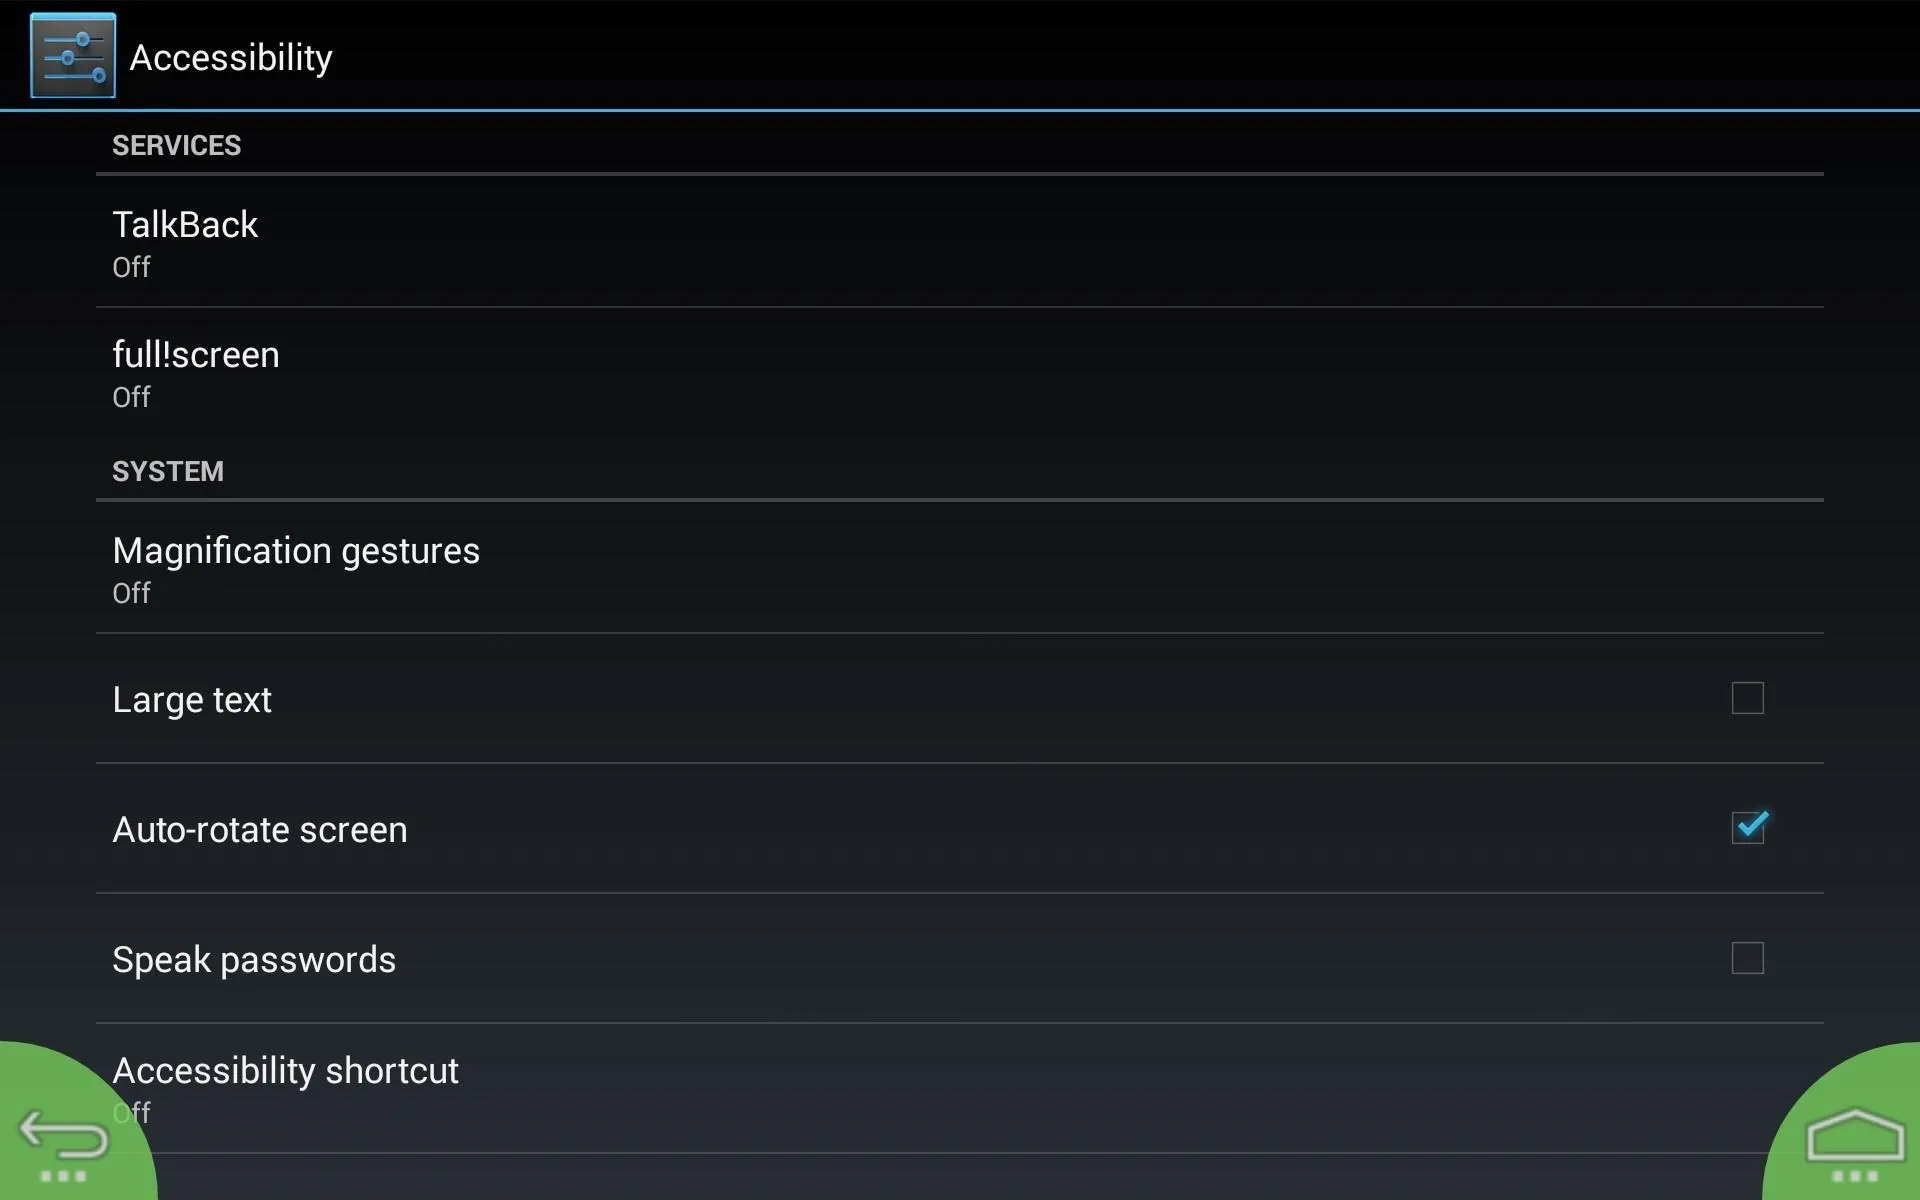
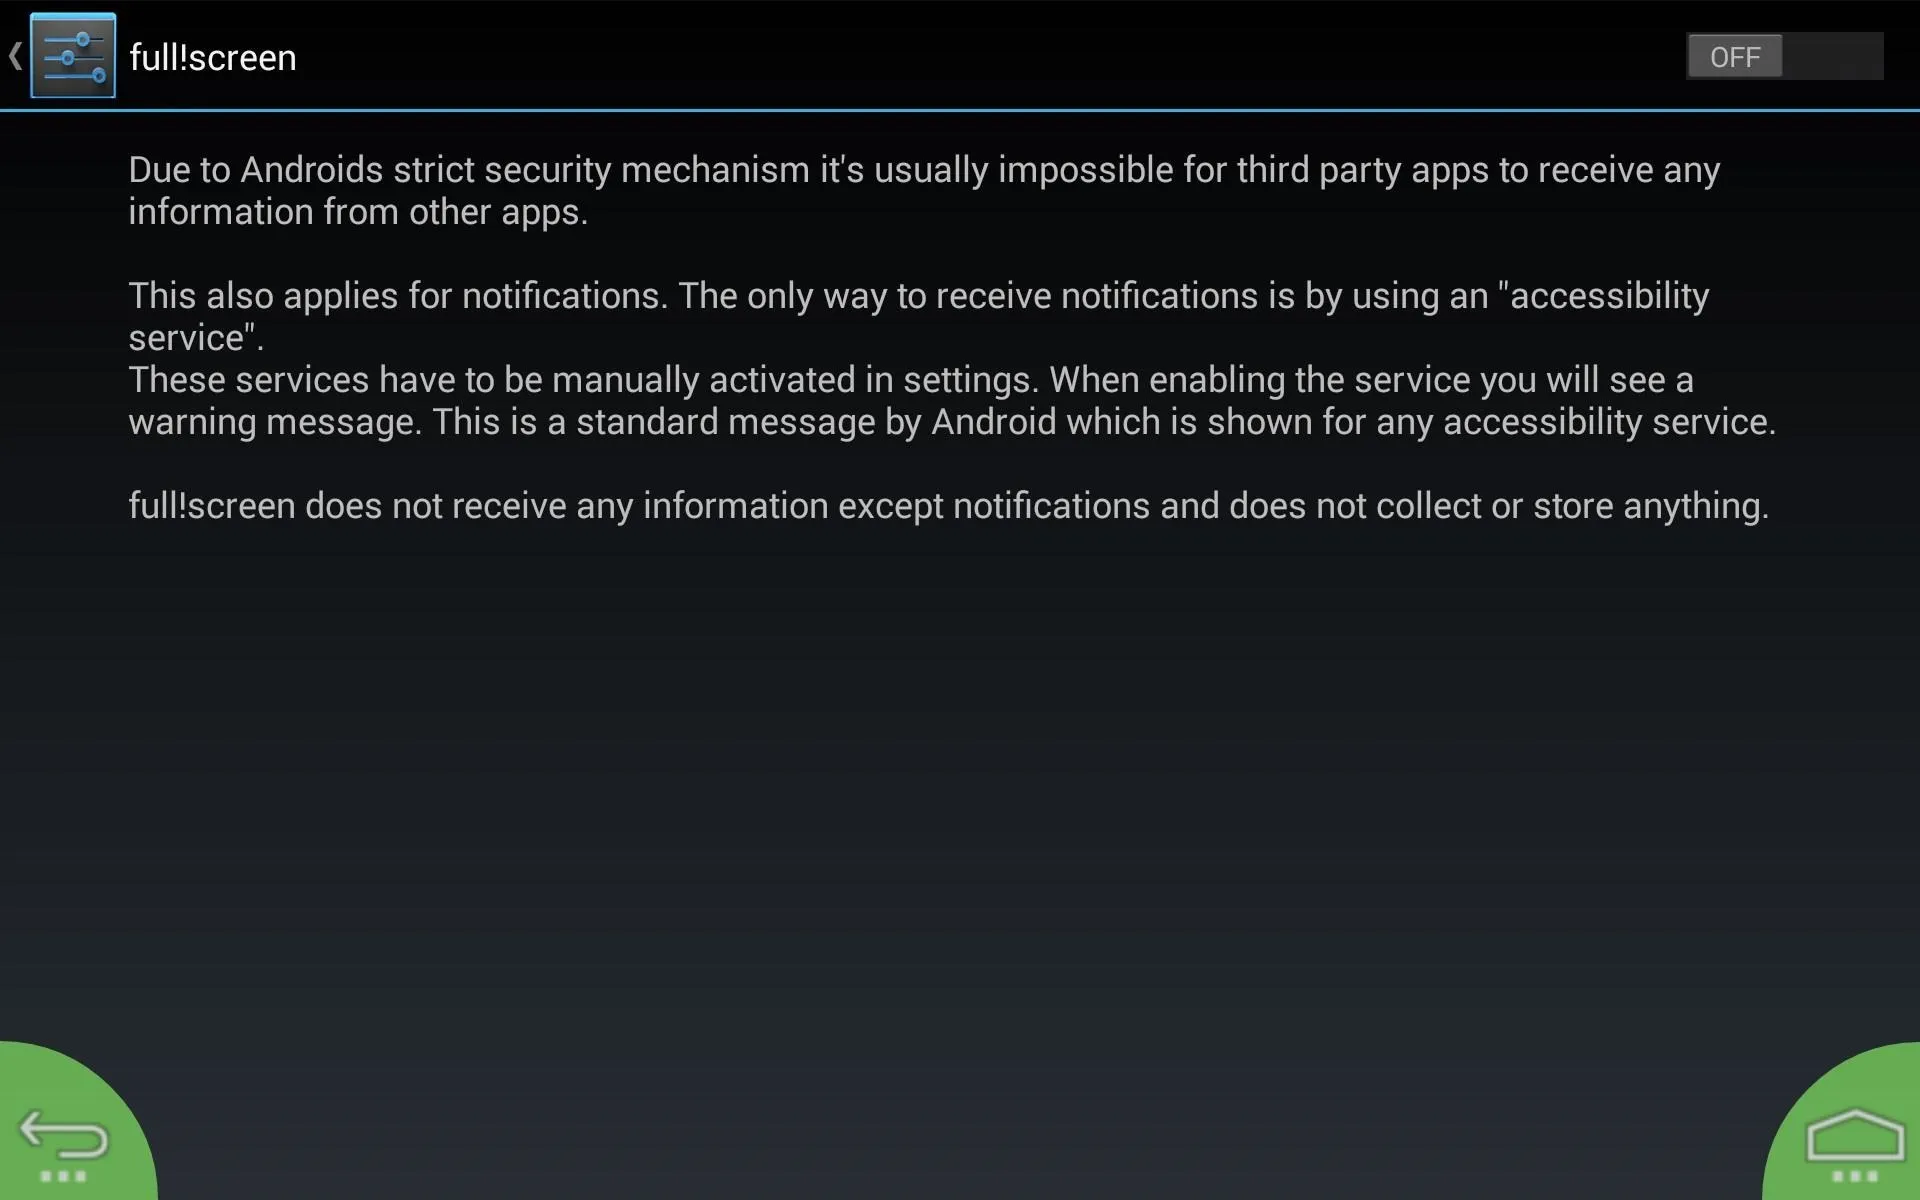
To enable notifications, simply follow the prompts.


Recent Apps
Worried about missing your Recent Apps list? Don't! Set the action, and when you trigger it, it will show up on the side of your screen.
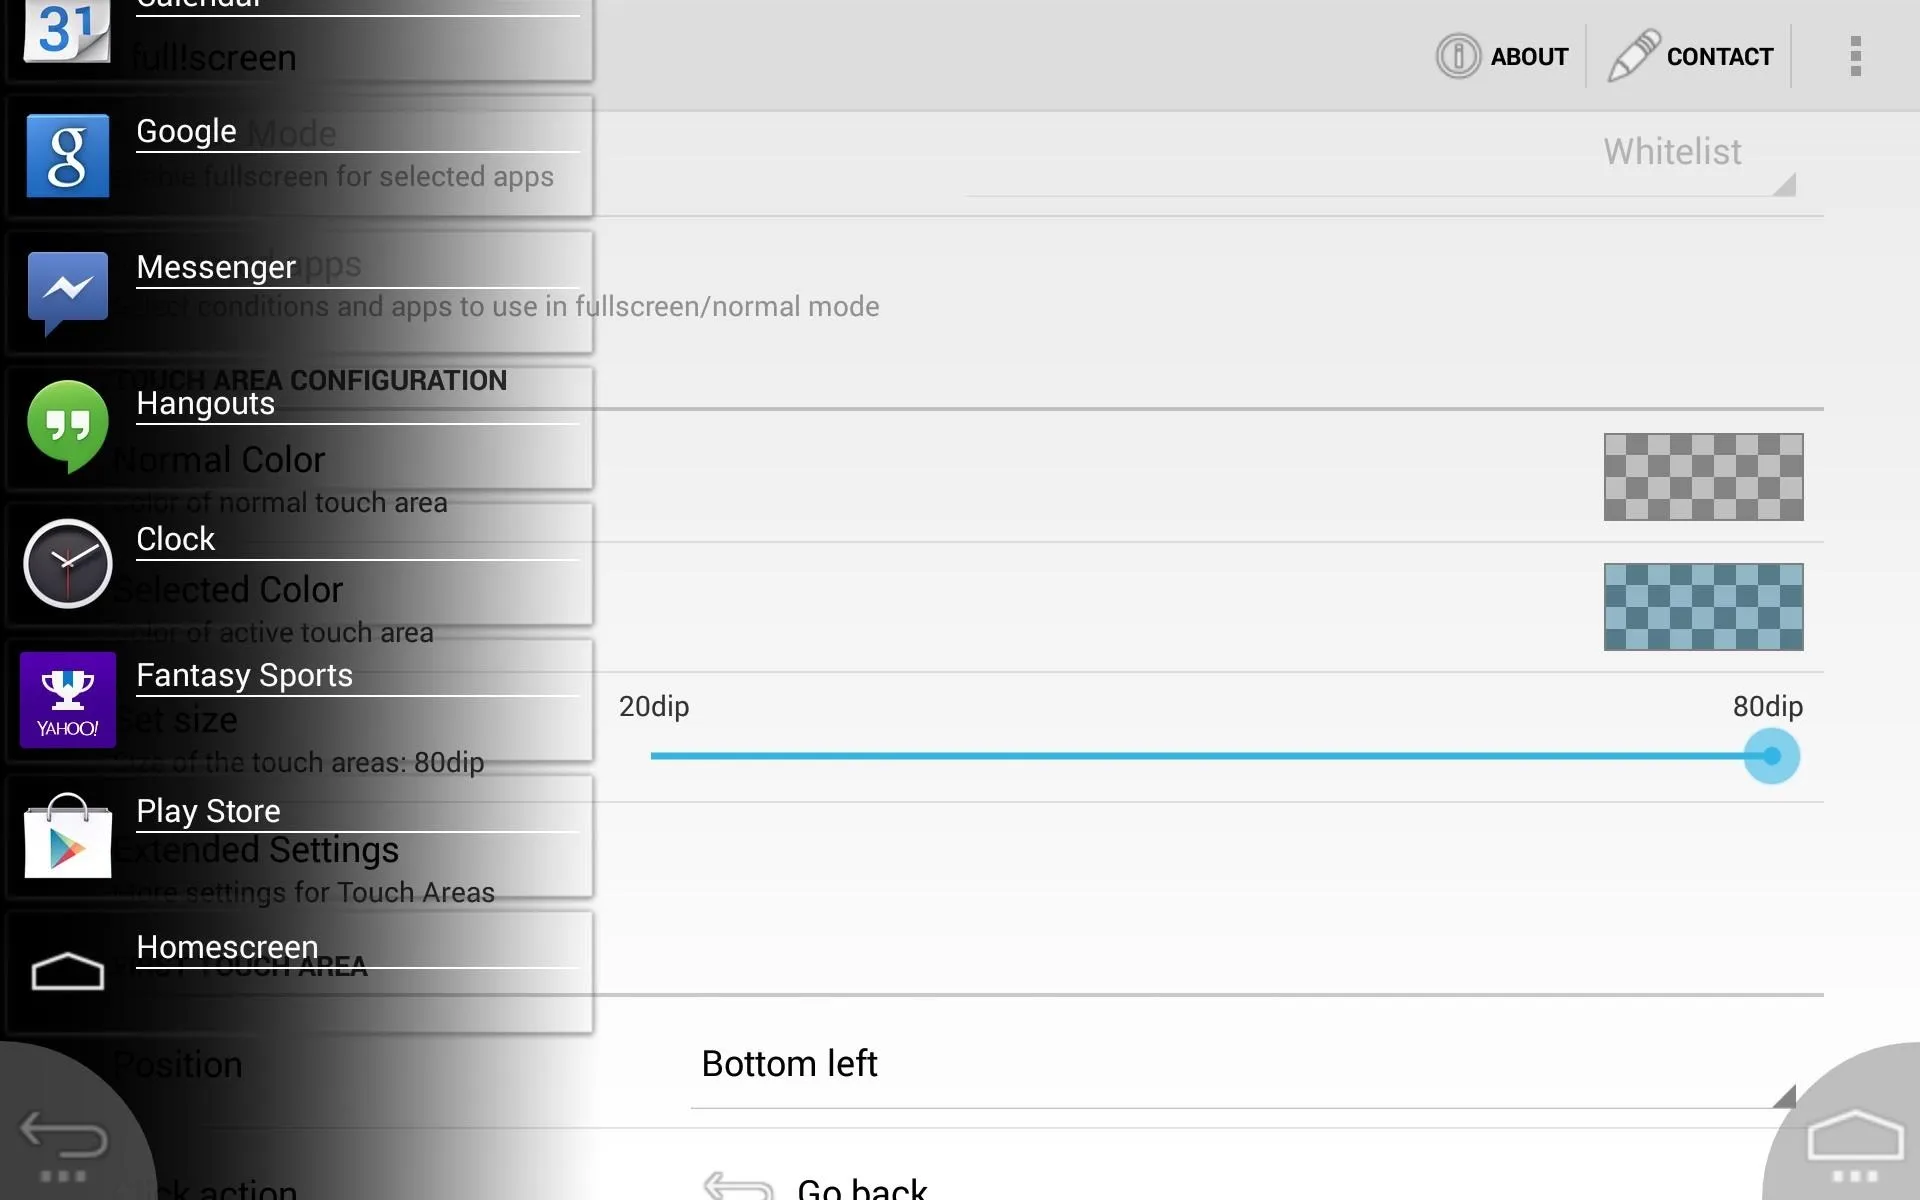
That's it! You are all set to utilize a max screen size. Keep in mind, the default "Long click" action for the Home button will restore your notification and status bars, so it's really easy to switch on-the-fly.
Step 5: Upgrade to Plus for More Features
The free version does a lot, but there's also full!screen+ ($2.49) which supports an automatic mode. Just define the apps you want to use in full screen with no bottom bar, and it will do it automatically whenever the app is opened. If you don't care about that, the free version is still a very good option.
Questions? Comments?
If you guys have any questions or comments, go ahead and leave them below, and I'll try to get back to you with some answers.


Comments
No Comments Exist
Be the first, drop a comment!